Pineapple at Home: From Crown to Fruit — Yes, It Works!
Pineapple: The Definitive Guide to Growing the King of Tropical Fruits at Home
Pineapple, with its regal crown and unmistakable flavor, represents an exciting challenge for every gardening enthusiast. This extraordinary plant, scientifically known as Ananas comosus, is not just a delicious fruit to enjoy, but also a beautiful ornamental plant that can transform any space into an exotic corner.
Whether you are a beginner gardener or an expert with a green thumb, growing a pineapple requires specific knowledge, patience, and dedication, but the rewards it gives will repay every bit of effort invested.
From South American Forests to Your Windowsill: The Fascinating History of Pineapple
Few plants boast such a rich and fascinating history. Pineapple traces its roots to the fertile regions of the Paraguay and Paraná river basins in South America, where indigenous peoples cultivated it thousands of years ago. When the first European explorers discovered it, they were so struck by its beauty and unique flavor that they carried it overseas, rapidly transforming it into a symbol of luxury and hospitality.
As a member of the Bromeliaceae family, this plant is perfectly adapted to warm, humid climates.
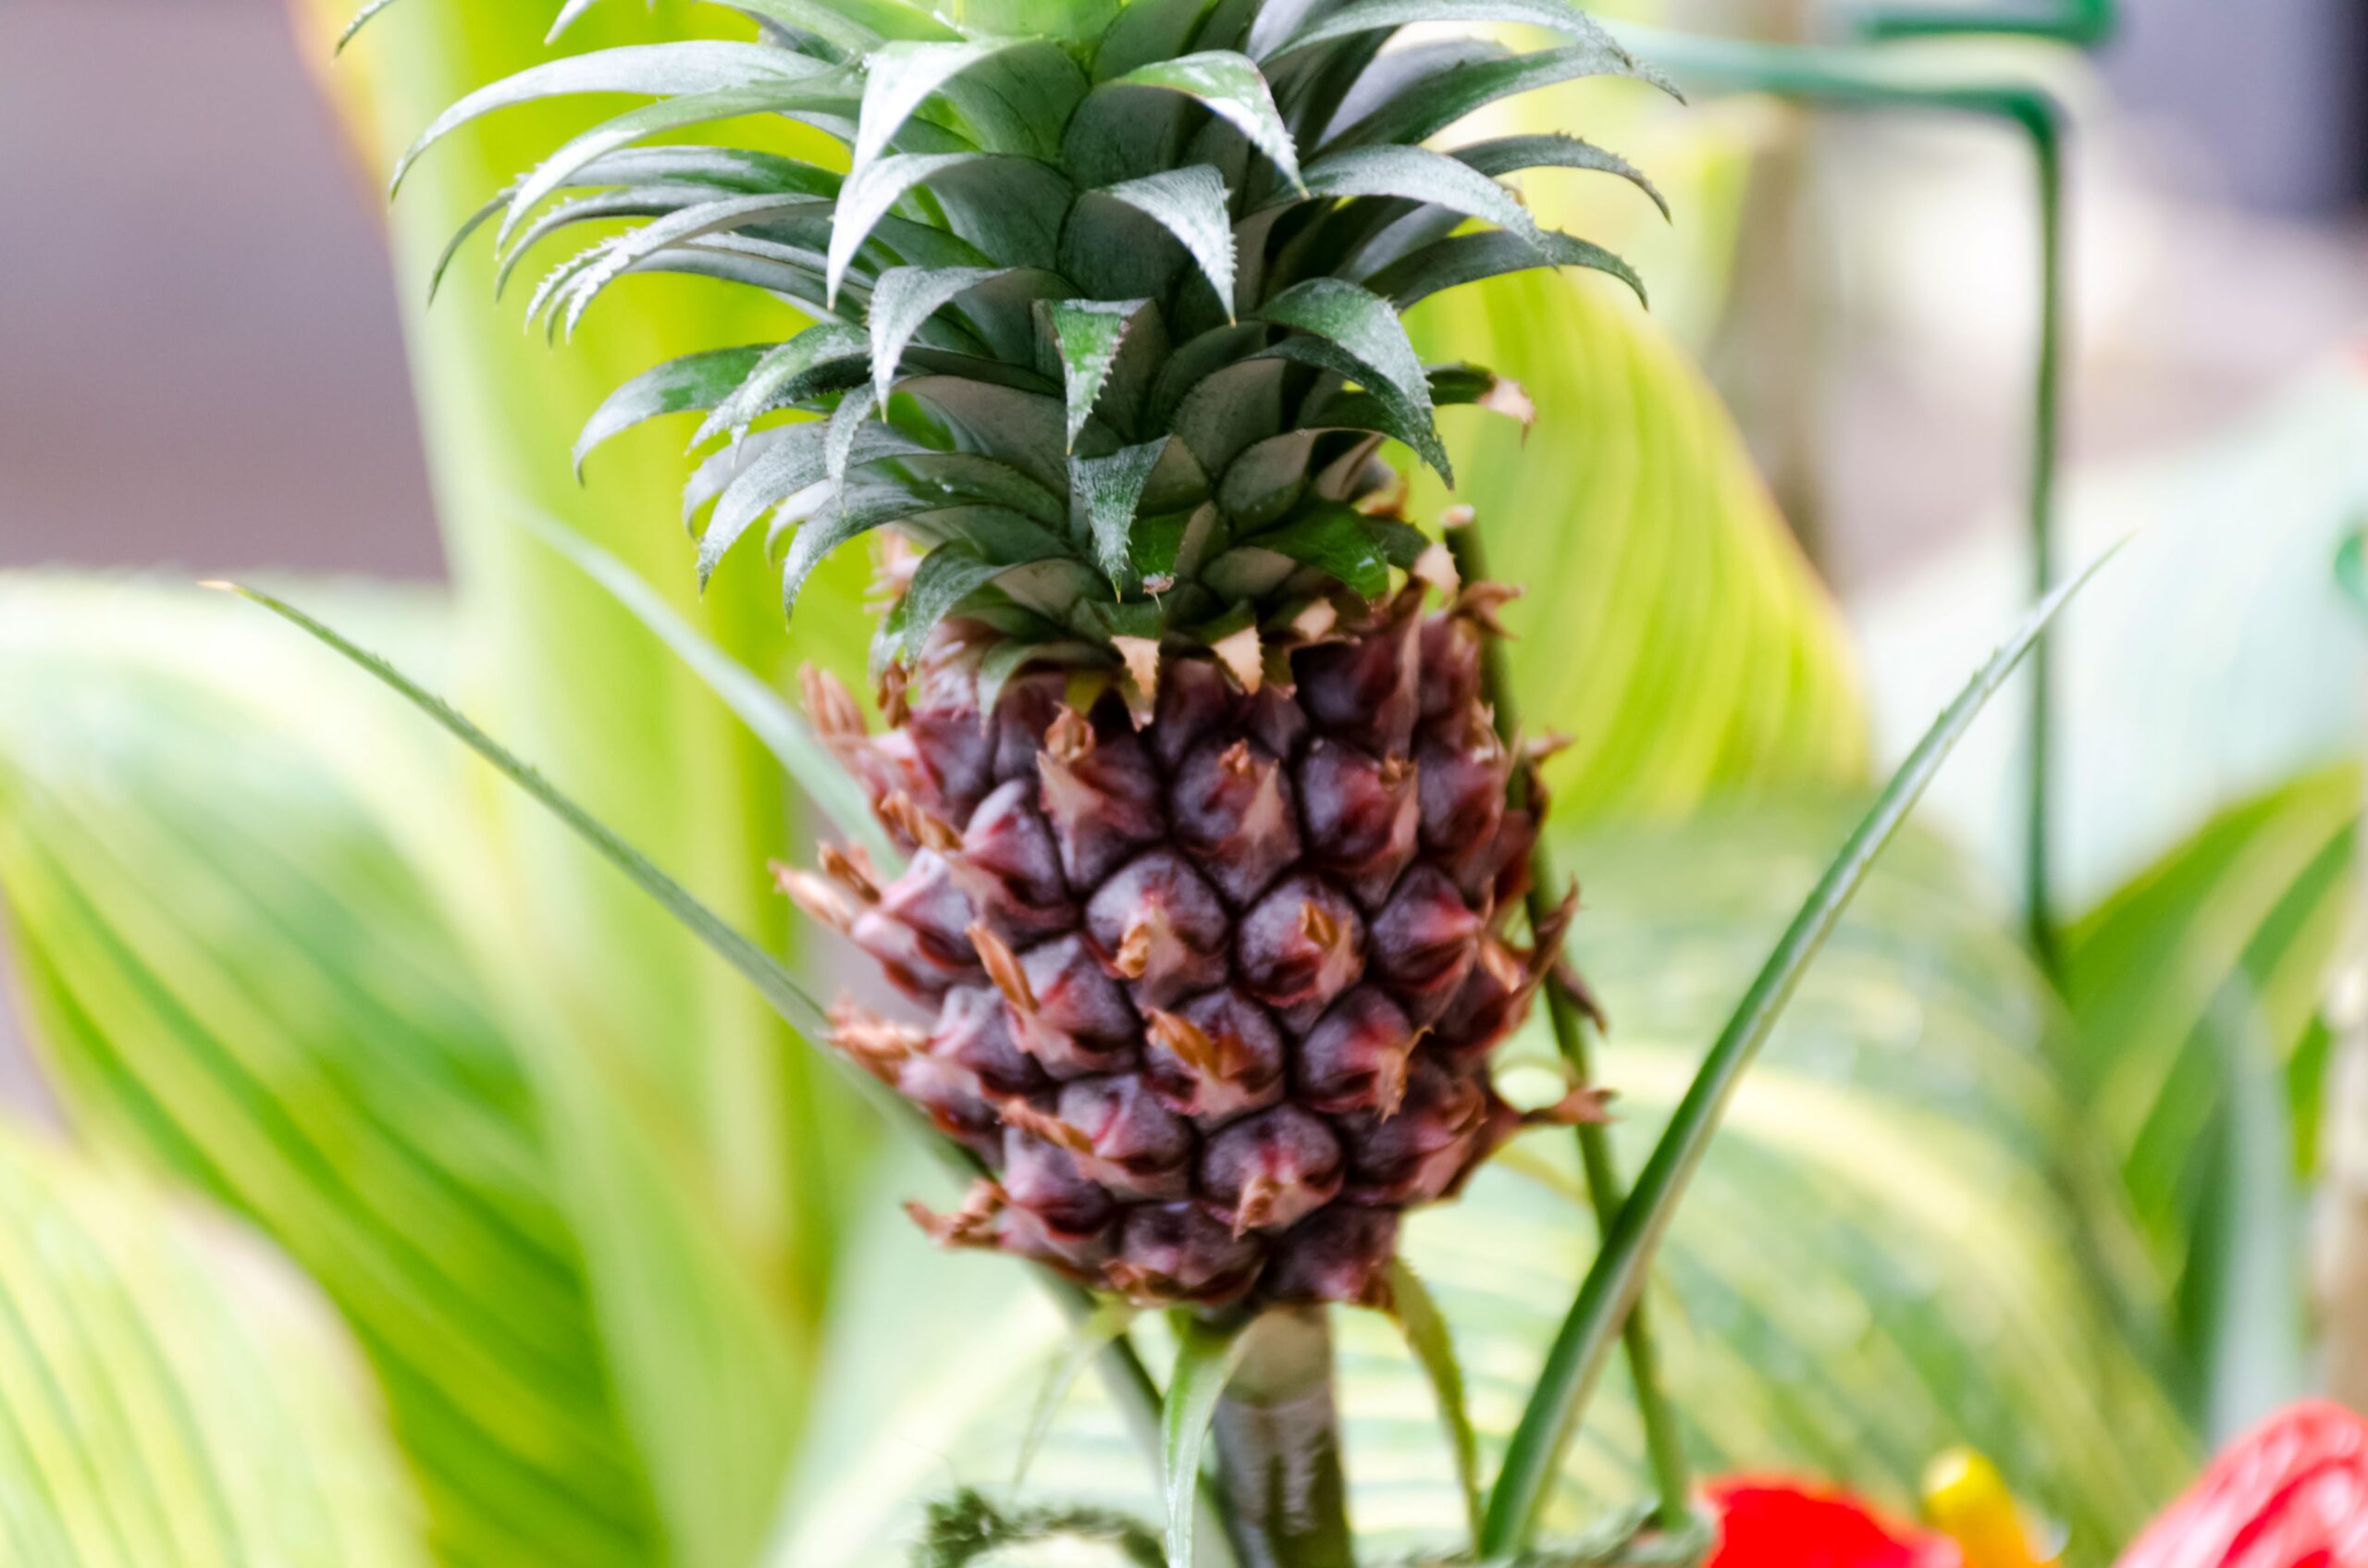
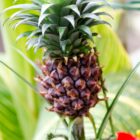
Botanically, what we commonly call the fruit is actually a complex inflorescence composed of numerous berries fused together around a central axis, making pineapple unique among edible plants and particularly interesting for those who love to understand nature’s mechanisms.
Why You Should Start Growing Your Own Pineapple Today
Growing a pineapple at home is much more than a simple hobby: it’s an educational journey that allows you to observe up close the life cycle of a tropical plant, understanding its needs and natural rhythms. A perennial herbaceous plant that can reach up to one and a half meters in height, pineapple adds an unmistakable exotic touch with its spiny leaves arranged in a rosette and its elegant form.
But there’s more: with the right light and temperature conditions, it is possible, even at our latitudes, to obtain mature fruits, although the process requires time and constant attention. Tasting a pineapple grown with your own hands has no price and represents the culmination of a path that unites science, art, and love for nature.
Choosing the Right Material: The First Step Toward Success
The journey in growing pineapple at home begins with a choice that seems simple but is fundamental: selecting the right starting material. The most popular and accessible technique consists of recovering the leafy crown from a fruit bought at the supermarket. When choosing the pineapple for propagation, make sure it is ripe but not overripe, with green, turgid leaves free of signs of decay or disease.

At home, gently remove the crown by twisting it off or cutting it with a sharp knife, leaving about one centimeter of fruit flesh attached. This step is crucial: remove the basal leaves to expose about 2-3 centimeters of stem, where roots will form. Before planting, let the crown dry in a shaded, ventilated place for 1–2 days. This “callusing” period allows the wound to dry, drastically reducing the risk of rot once placed in the soil.
The Perfect Substrate: Building the Foundation for Lush Growth
Choosing the right soil is one of the most critical aspects of growing pineapple at home. This tropical plant hates waterlogging and needs a substrate that guarantees impeccable drainage. The ideal mix includes quality universal potting soil, coarse sand or pumice (about 30–40% of the total volume), and coconut fiber, which not only improves drainage but maintains good moisture levels.
If you prefer a more professional approach, you can use a cactus and succulent specific substrate, naturally predisposed for plants that fear excess water. Adding perlite can further enhance root aeration. Regarding nutrition, if the starting substrate is already rich in organic matter, initial needs will be limited. However, during active growth, supplementing with a liquid fertilizer diluted in irrigation water supports vigorous plant development, supplying essential nutrients for healthy leaves and eventual fruit formation.
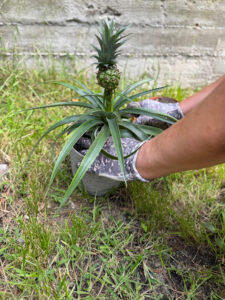
Containers and Drainage: The Importance of a Suitable Home for Your Pineapple
The right pot makes a difference in determining cultivation success. Choose a container with generous drainage holes at the bottom, with dimensions proportional to the pineapple crown you are planting: for beginners, a diameter of 20–30 centimeters is generally sufficient. As the plant grows, you may need to repot it into larger containers.
The material of the pot matters: terracotta, although heavier, allows better breathability and helps prevent excess moisture; plastic is lighter and retains moisture more, which can be advantageous in very dry climates but requires greater care in irrigation. Don’t forget to create a drainage layer at the bottom: 3–5 centimeters of gravel, expanded clay, or broken terracotta favors water outflow and prevents direct contact of the roots with standing moisture.
Light and Heat: Recreating Tropical Paradise Conditions
Pineapple is a child of the sun and high temperatures, and these requirements must be fully respected to ensure optimal growth. The plant needs at least 6–8 hours of direct sunlight daily: indoors, place it near a south or southeast-facing window where it can receive maximum radiation.
During winter, when days are shorter and natural light diminishes, consider using LED grow lights to supplement illumination and maintain plant health. Regarding temperature, pineapple thrives between 20°C and 32°C: temperatures below 15°C significantly slow growth and can stress the plant. In winter, if you are growing outdoors, you must bring the plant inside or protect it in a greenhouse. This tropical plant does not tolerate frost; even a brief exposure to temperatures near zero can cause irreversible damage.
Conscious Irrigation: The Art of Dosing Water for Your Pineapple
The most common mistake, especially among beginners, is to give too much water. Pineapple has developed mechanisms that allow it to tolerate drought much better than excessive water. The golden rule is to keep the soil slightly moist but never soggy: before watering, always check that the top 2–3 centimeters of soil have dried out.
This simple tactile test helps avoid the main enemy of tropical plants in pots: root rot. In summer, you may need to water more frequently, while in winter watering becomes much less frequent. The quality of water also matters: if possible, use rainwater or let tap water decant for 24 hours before use to allow chlorine to evaporate. Very cold water can shock the roots, so in winter use water at room temperature. In bromeliads like pineapple, you can also pour a bit of water directly into the central rosette of leaves, simulating the way the plant collects rainwater in nature.
Strategic Nutrition: Feeding the Growth of Your Pineapple
Proper fertilization represents the fuel that allows your plant to grow vigorously and potentially produce fruit. Especially when the starting substrate is not particularly rich, using a balanced organo-mineral fertilizer such as Pro-Care NPK 5.5.5. Plus supports the plant during the phase of greatest vegetative activity, from spring to summer. This balanced formulation provides nitrogen, phosphorus, and potassium harmoniously while avoiding excess that could stress the roots. Diluted in irrigation water every 2–4 weeks in warm months, it promotes compact vegetation and intense leaf color. In winter, when growth slows, it is appropriate to reduce or suspend applications altogether.
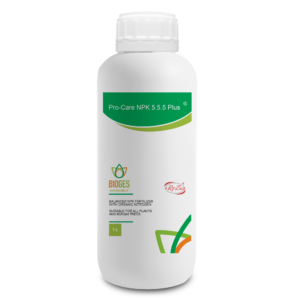
Micronutrients such as iron, magnesium, and calcium are also appreciated: if you notice yellowing leaves despite correct watering, it may indicate nutritional deficiencies that can be corrected with microelement-based supplements.
From Crown to Plant: The Rooting Process of Pineapple
After the drying period, it’s finally time to plant the crown. Insert the base into moist substrate to about 3–5 centimeters depth, taking care not to bury the green leaves. Firm the soil gently around the stem to provide stability, but not excessively: roots need space to spread.
In the first weeks, keep the substrate consistently moist (not soaking) and place the plant in a warm and bright environment, ideally between 24°C and 27°C. Ambient humidity plays an important role at this delicate stage: misting water on the leaves once or twice a day helps prevent dehydration and stimulates root formation. Some growers create a mini greenhouse by placing a transparent plastic bag over the plant, ensuring daily ventilation to prevent mold. After about 3–8 weeks, you should notice the first signs of rooting: new leaves emerging from the rosette center and a greater resistance when gently lifting the plant. At this point, your pineapple has taken root and is ready to start real growth.
Daily Maintenance: Small Gestures for Big Results
Once the pineapple is established, the care routine becomes simpler but should not be neglected. Cleaning the leaves is important: dust that accumulates on the leaf surface reduces photosynthesis capacity, so regularly wipe them with a damp cloth, taking care around the spines. Monitoring soil moisture remains fundamental: develop the habit of checking the substrate before irrigating, avoiding automatic watering that could lead to excess or deficiency.
Remove dry or damaged leaves promptly by cutting them at the base with clean, sharp scissors: this not only maintains the plant’s look but prevents pathogen settlement. During the growing season, slightly increase the frequency of liquid fertilization, while in autumn-winter gradually reduce both watering and fertilizer, allowing the plant to enter a natural rest phase. Rotate the pot periodically to ensure even growth: pineapple tends to grow toward the main light source, and rotating it every two weeks yields a more symmetrical rosette.
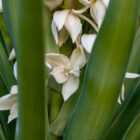
The Magical Moment: Pineapple Flowering and Fruiting
Pineapple flowering represents the culmination of months or even years of patient care. Generally, the plant is ready to flower after 12–24 months from planting, though timing can vary considerably based on environmental conditions, variety, and care. The first sign is the emergence of a flower stalk from the center of the rosette, gradually developing numerous small flowers that, once fertilized (often by self-pollination), begin to fuse into what will become the fruit.
This process is extraordinarily slow and may take 5–6 months from flowering to full maturation. During this phase, maintaining optimal light, temperature, and nutrition conditions is essential: the plant is making a huge effort to produce fruit and needs all possible support.

Common Problems and Practical Solutions
Even with the best care, issues can arise during your pineapple’s cultivation. Yellowing leaves are often the first warning sign: if yellowing starts at the tips and moves toward the base, it may indicate excess salts in the soil due to overly frequent fertilization or very hard watering. In this case, water abundantly with clean water to wash away salts and reduce fertilization.
If leaves become uniformly yellow, it’s likely due to nitrogen deficiency or insufficient light: move the plant to a brighter location and gradually increase fertilization. Dark or brown spots on leaves can indicate fungal or bacterial problems, often linked to excessive humidity: remove affected parts, improve ventilation, and reduce watering. Stunted growth suggests temperatures that are too low, inadequate light, or nutrient deficiencies: verify that all environmental conditions are optimal and supplement accordingly. Root rot, recognizable by soft, dark leaves at the base and a foul smell, requires drastic measures: remove the plant from the pot, eliminate all rotten roots, let it dry, and repot in completely fresh, dry substrate, drastically reducing future watering.
In Conclusion
Growing a pineapple is an experience that attunes you to the slow and ancient rhythms of nature, educates patience and consistency, and offers deep rewards. Success arises from attention to detail: well-draining soil, plenty of light, measured but regular watering, stable temperatures, and balanced fertilization. There are no shortcuts, but with method and dedication even beginners can transform a simple piece of waste into a splendid tropical plant. This process requires time — often between 18 and 36 months — during which observing growth, caring for the plant, and learning to interpret its signals become part of the experience itself. In the end, you realize that the value lies not only in the final result but in the entire journey: a process of learning, patience, and harmony with nature.
If you have any questions or require further information, the Bioges team is always ready to assist you. You can contact us on our social media channels or by sending an email to info@biogesandco.com

Recent Comments